Grandma's Pajamas Pig
Here is another little craft in the series of up-cycling that I have
been attempting to do. Using scraps from my crafting stash instead of buying more supplies is one of my goals, to see what things I can come up with using what I already have. Being stuck at home has made me think a lot about what I can do to diminish my stash, and do simple creative things at the same time. I hope that this inspires others to find fun in creating things from what they find around them.
Here are the pieces I drew up for my pig. It's not many, just a front in a pig shape, two pieces for the back, because I wanted the piggy to be able to sit. (I got this idea from looking at the Chloe doll I used the body of in an earlier project, and a pig I saw in a book.) Two little ear pieces for inside the ears, a snout piece, and two different sized hoof pieces, one for the top hooves and one for the bottom.
I thought at first I would be just sewing him up on my sewing machine, but my first attempt was the back bottom seam, which I sewed up putting right sides together. I found out right away that my old Kenmore sewing machine simply did not like that stretchy fleece. I decided right away that since it was such a small project anyway I would sew the rest entirely by hand.
Here you can see I have cut out of a darker pink the little detail pieces for my pig, and have begun to stitch them down using a nice buttonhole stitch. I had the felt in my crafts stash, as well as the tiny black felt balls I used for the eyes. The hooves take four pieces each for the top and the bottom hooves.
Using black thread I embroidered a smile on his face and gave his nose a few whip stitches to make his little nostrils. Then I attached the felt balls by stitching through them and tying them off on the back of the fabric. That way all of the tied off threads will be hid inside, when you put the pieces together, and stuff it.
Here is a closeup so you can see that I also gave him some black thread eyelashes, and using white thread, put a couple of whip stitches through the eyes to give them that little reflective look, which to me always makes them look a bit more real.
Here I have pinned the piggy with the wrong sides together, as I plan to buttonhole stitch his entire outside seam. He doesn't look like he cares for the pins very much does he?! We will refrain from calling him pokey pig! OINK!!!
Because I forgot to leave an opening in his bum as I had first intended, (for stuffing him), because my machine was giving me such a pain. I decided I had better leave an opening here where it would be easiest to finish off with the buttonhole stitch. All the stuffing for my projects like this one, come from old worn out pillows, which I have run through my washing machine and dryer. I find it to be a perfect up-cycling stuffing material.
Here is Mr. Piggy, happily all stuffed and stitched up, but without his hooves. I found that his arm tips just did not want to stuff properly. The padding just kept coming back out because his arms were so short. This was not too much of a worry tho, because I knew I could fix it once I put on his hooves.
Here is his back all smooth and nice, and he is sitting like a charm because of his bum seam. I am actually pretty happy that I have that one seam sewn with the edge inside as it looks so nice and smooth. It is a process I shall probably repeat in the future. What a happy accident!
Here is where I fixed that under-stuffed feet issue. As I sewed together the two little pieces of felt for each hoof, I stuffed them hard before buttonhole stitching them on. This took up the flatness, but I should have watched out that I was making his left arm a little too short. Oh well, this is the life of an artist, and nobodies perfect, right?! ...oink, oink, oink...
Here he is again from the back, and overall I think he is looking pretty good. His hooves are all on and he is sitting pretty pink in his striped pajamas.
Oh dear, I have forgotten something! What could it be?! It's his twisted little tail of course! What would a pig be without its tail?! Hmmm, here was a problem. I didn't want to embroider a tail on him, as it just seemed too flat. I wanted a three dimensional tail, but how to come up with something to make a tail?!
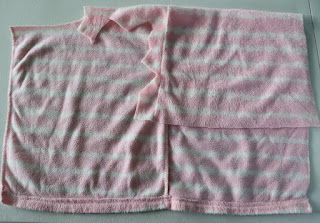
I was thus pondering to myself, when my eye caught sight of the serged seam of my pajamas. I thought, what happens if I cut a length of that off, cutting it to a curved tip at one end, run a basting stitch up its length and gather it?
The answer my friends is the quickest, cutest, curly little piggy tail you could ever ask for, and because it is fleece it doesn't unravel. I whipped stitched it into place and my piggy was done!
Or so I thought! I was very happy with my little pig, and I put him up in a place that I could look at him, but he just didn't seem quite right to me. I thought he needed more definition between his head and his body. This took some careful thinking, as of course this entire project I was winging it, me never having done a pig like this before. I suppose I could have watched a video or something, but to me it takes all the fun out of it sometimes, if I don't solve the problem myself.
Sometimes the best fun is the process of figuring things out, and the discovery that a thing works. I decided to try and take some strong pink thread and do a running stitch along the back of his neck, pulling it at the side seam and tying it off. That worked very well. He went from flat in the back to having a neckline.
So I continued around the front, doing the same thing. I then did a second basting stitch around the entire neck to give it more strength, and was very happy with the results. Mr. Piggy now has a defined head and neck. Yippy!!!
Here is Mr. Piggy, (whose name is Bonjour), in my chair full of dolls. He has taken a great liking to my French doll, whom he says is the only one who truly understands him. I don't speak French or Pig, so I won't argue with him. She seems to tolerate his presence, and they seem boon companions, so if he is happy I am happy. Maybe he can snuffle up some truffles for her?!
I will say this pig was a sweet little challenge, (he being but six inches tall in his seated position), but he was not too difficult. He is definitely a project that can be finished in a few hours, if you have the scraps on hand. I liked the fleece and the wool felt, as it was so easy to work with and you didn't have to worry about fabric unraveling.
I think Bonjour's smile turned out to be a bit smirkier than I initially wanted, but I put that down to my first
attempt at trying to embroider on thin fleece. In the end it gives him his own little personality. After all it can't be easy being a pig!
I hope you have enjoyed this newest attempt of mine. I think my Grandma's Pajamas made a nice little pink fleecy pig! May you have a God blessed day!


Comments